How to Block Specific Hosts in DataSunrise for Enhanced Database Security
In the digital age, where data breaches and cyber-attacks are becoming increasingly common, protecting your database from unauthorized access is more important than ever. DataSunrise Database Security is a powerful tool that helps you safeguard your data by setting up various security measures, including the ability to block specific hosts from accessing your database. In this comprehensive guide, we will walk you through the steps to effectively block a specific host in DataSunrise, ensuring that your database remains secure and accessible only to authorized users.
Understanding DataSunrise Security Rules
Before we dive into the specifics of blocking a host, it’s essential to understand what Security Rules are in DataSunrise. Security Rules are the core components of DataSunrise’s security mechanism. They allow you to define conditions under which certain actions will be taken, such as allowing or blocking access to your database. These rules can be based on various parameters, including IP addresses, usernames, time of access, and types of queries.
Step-by-Step Guide to Block a Specific Host
Step 1. Adding Hosts and Host Groups
To begin with, you need to define the hosts or networks that you want to block. Here’s how you can add a single host or a network:
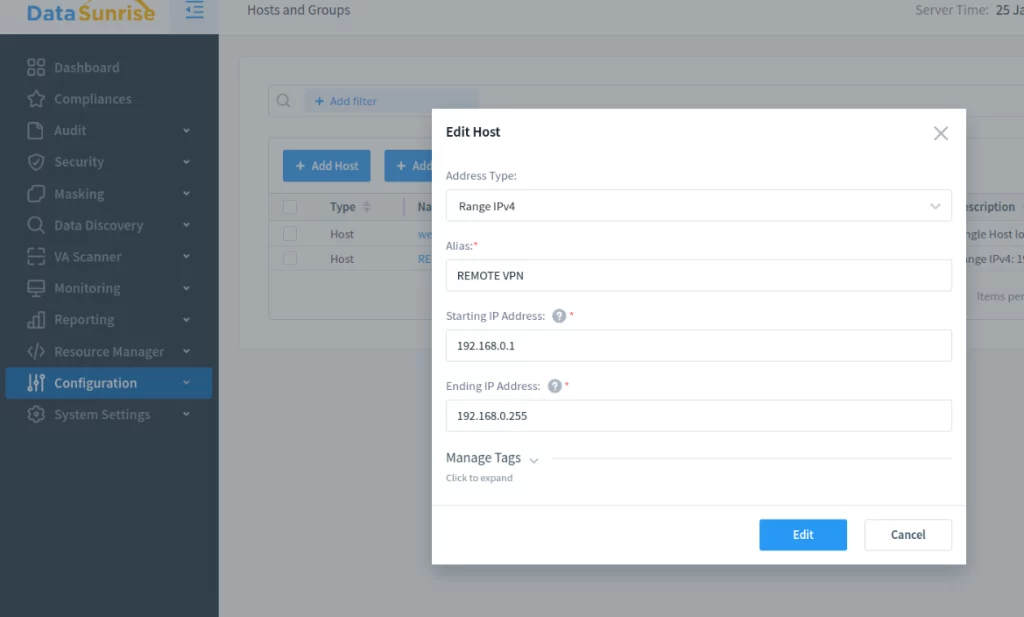
- Navigate to Configuration -> Hosts in the DataSunrise interface.
- Click on +Add Host to add a single host or a network. You will need to enter the IP address or range of addresses for the host or network you wish to block.
- If you want to block multiple hosts or networks, you can group them by clicking on +Add Group. Assign a logical name to your group and select the hosts you want to include.
- Save your newly created Hosts and Host Groups.

Picture 1. Adding Host
Step 2. Creating a New Security Rule
Once you have your hosts or host groups set up, you can proceed to create a Security Rule to block them:
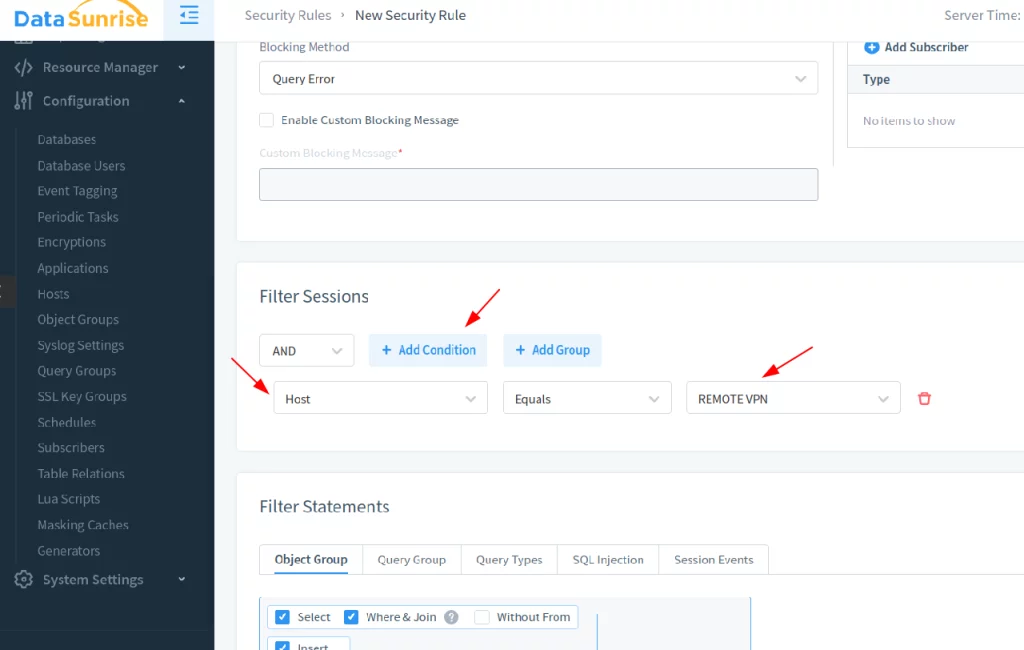
- Go to Security -> Rule and click on Add Rule.
- Select the database instance you want to protect.
- In the Filter Sessions section, click on +Add Condition and select Hosts or Hosts Group if you’re including multiple hosts or networks.
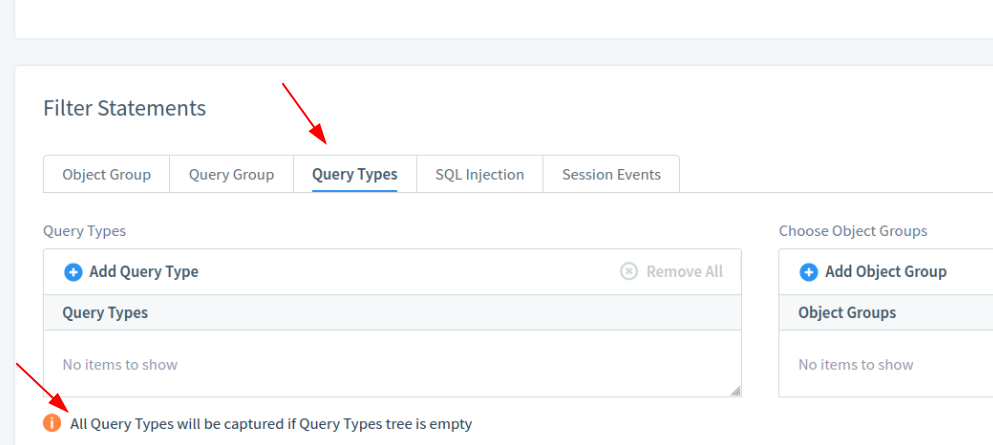
- If you want to block all queries from the selected hosts, navigate to the Filter Statements option box, click on Query Types, and save the rule.

Picture 2. Creating a New Security Rule

Picture 3. Filter statements
Step 3. Configuring the Security Rule
After adding the host or host group to the rule, you need to specify the action that DataSunrise should take when the rule is triggered:
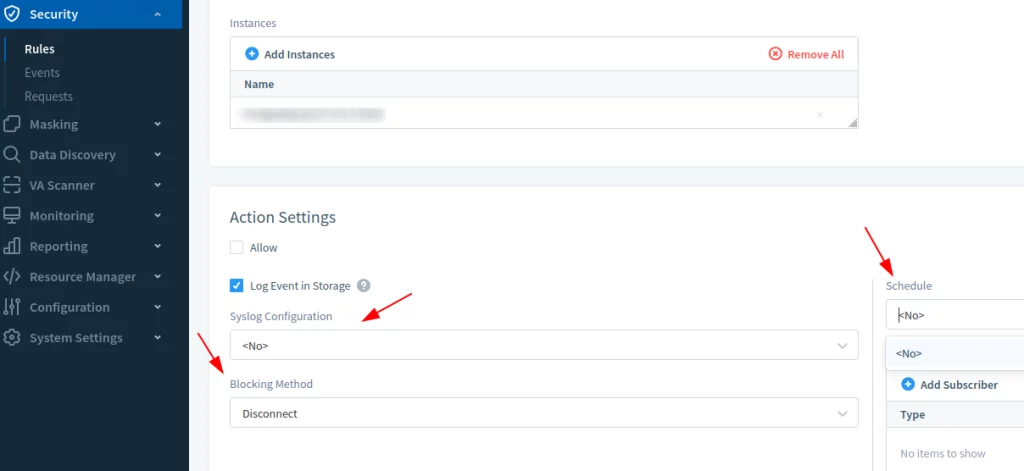
- Choose the action to Block when the condition matches the specified hosts or host groups.
- You can also specify additional conditions, such as blocking only certain types of queries or access during specific times.
- Once you have configured all the necessary conditions and actions, save the rule.

Picture 4. Action Settings
Step 4. Testing the Security Rule
It’s crucial to test the new Security Rule to ensure it works as expected:
- Attempt to access the database from the blocked host or network.
- Verify that the access is denied and that the attempt is logged by DataSunrise.
- Review the logs to confirm that the rule is being triggered correctly.
Step 5. Monitoring and Maintenance
After successfully blocking a host, continuous monitoring and maintenance are essential:
- Regularly review the logs to ensure that the rule is still effective.
- Update the rule as needed, for example, if the IP address of the host changes or if you need to add new hosts to the block list.
- Keep your DataSunrise instance updated to benefit from the latest security features and improvements.
Conclusion
Blocking specific hosts from accessing your database is a critical aspect of database security. Following the steps outlined in this guide, you can leverage DataSunrise’s powerful Security Rules to restrict access and protect your data from unauthorized users. Remember to regularly review and update your security configurations to adapt to the ever-evolving cyber threat landscape. With DataSunrise, you can have peace of mind knowing that your database is secure and your sensitive information is well-protected.