How To Control the Visibility of Table Names
Managing access to a substantial volume of data within an organization poses considerable challenges. Particularly when numerous individuals are involved, ensuring controlled access becomes a complex endeavor.
Given these circumstances, the need for data protection becomes paramount. Unauthorized access and manipulation can lead to significant consequences, highlighting the importance of implementing strong security measures.
Understanding the importance of this concern, DataSunrise offers a solution known as Data Masking. By embracing this strategy, organizations can safeguard their data from unauthorized activities, thereby strengthening their defenses against potential risks. Data Masking emerges as a crucial tool among various protective measures, empowering organizations to uphold data integrity and confidentiality in the complex landscape of modern information dynamics.
Data Masking offers more than just masking data – it also provides the option to conceal entire rows of information. By creating a masking rule, specific user groups can be restricted from accessing certain data portions, ensuring that only relevant information is made available for their tasks.
To illustrate, let’s take the scenario where we aim to conceal table names based on various departments within the organization using the “HIDE ROWS” feature within DataSunrise.
For the sake of visualization, let’s assume that we have established a connection to a local PostgreSQL database in DataSunrise and have subsequently integrated the proxy connection as well.
First, we will create a masking rule by executing the following steps.
Go to Masking > Dynamic Masking Rule > Create New Rule.
In the General Settings, give an appropriate name of the rule that you are going to create. Choose database type and instance that you would like you apply this rule.
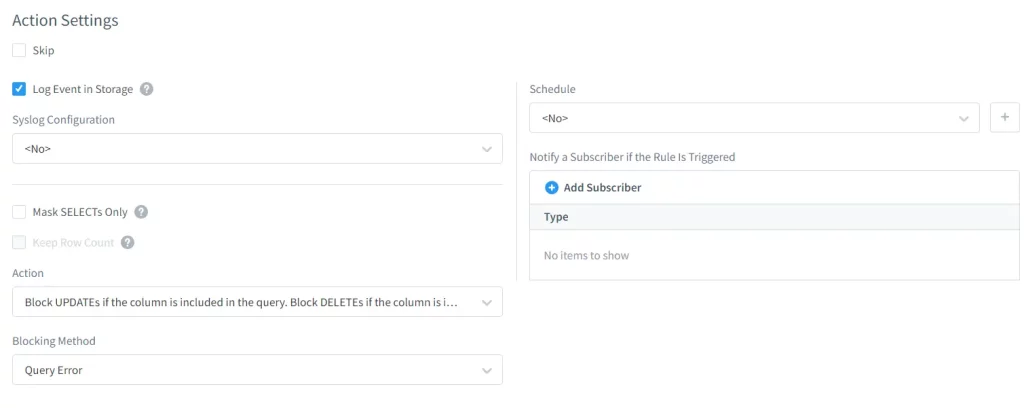
Also, do not forget to enable the Log Event in Storage checkbox so that you will be able to check the masking events take place in Dynamic Masking Events section. Other fields are optional and can be left without filling in if it is not required.

Then, in the filter session, we can set up necessary conditions. For example, we can determine the rule is applicable for specific database users or DB User Group. Here, as I do not want the unrelated data like HR department’s data to the user “developer1”, I will filter this user out. So, if someone enters the DBMS with “developer1” user account, he will not be able to access the restricted data.

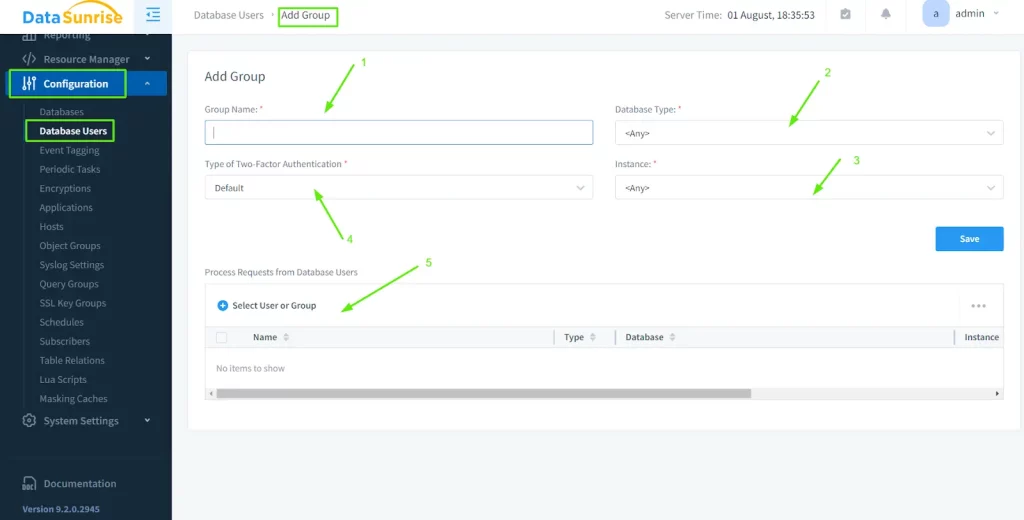
Or if it is necessary to hide the data from multiple users (e,g: developer1+developer2 = “testers” group), there is an option to collect the users into associated groups.
Finally, the main masking setting can be set up. Since we are discussing a topic about hiding the table-name in this article, we will stick with “Hide Rows” option.
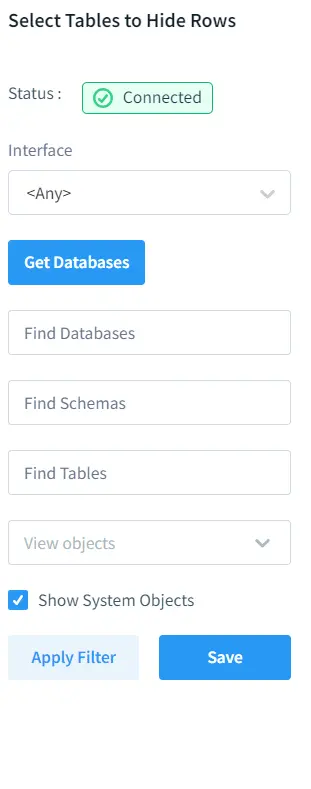
After choosing “Hide Row”, it will navigate to the necessary settings to hide the tables. Here, we will manage the visibility of the table-names that is located in the instance. So, we will hide the rows from system object which is pg_catalog.pg_class. To be able to select the system objects, it is important to turn on the checkbox called “Show System Objetcs”.
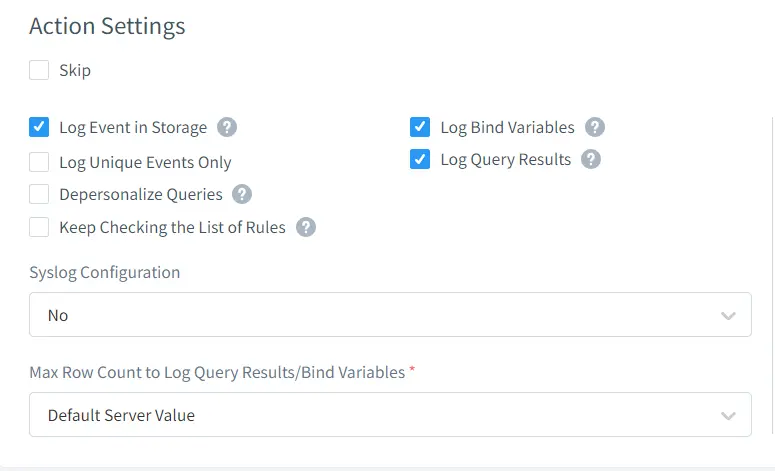
Note: If you are not sure about what system object table is used in PgAdmin to build UI display, DataSunrise’s Data Activity Monitoring (Auditing Service) is a good help to you. The below settings are recommended to turn on because you might need to test multiple queries to make sure and check the trailing section after executing the queries.
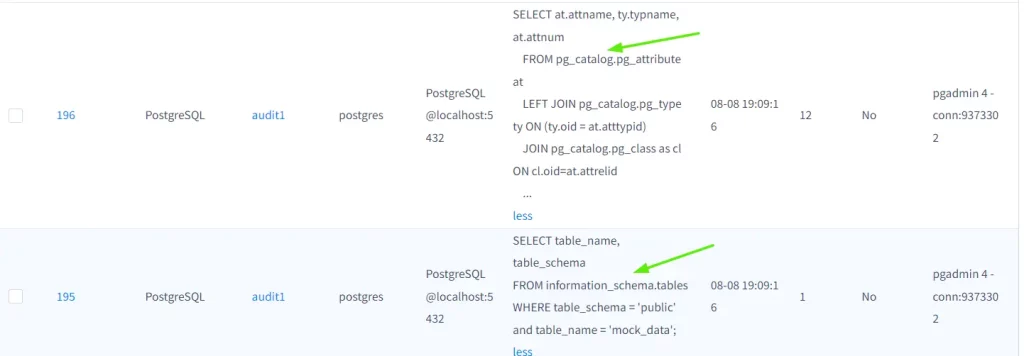
There will be some queries about of the actual query executed. By entering the “ID” of translation, you will be able to check the detail of how the data are collected and display to UI.
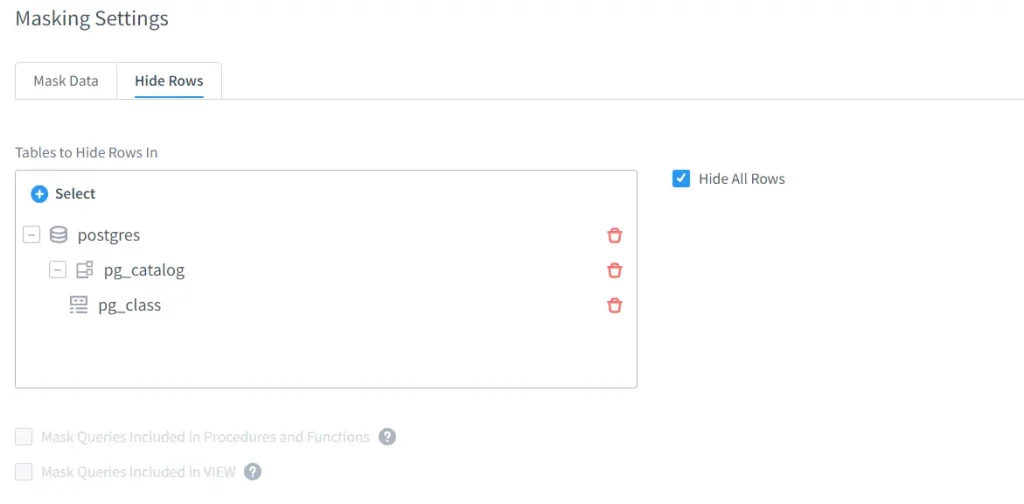
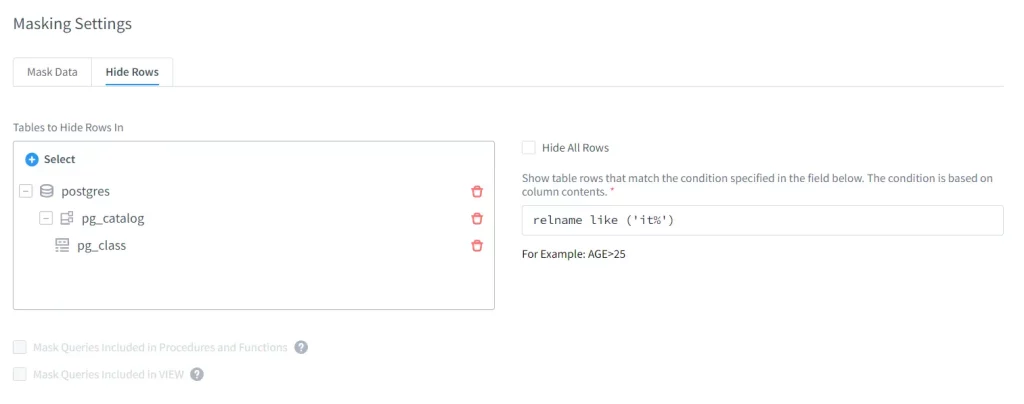
Besides, choosing “Hide All Rows”, it is also available to hide only the relevant rows which contain the particular keyword by setting the condition for the value of the column rows of which should be hidden.
Here, as I have mentioned above, I do not want to give access of HR department’s data to the user “developer1”. But, data from IT department will be visible to him. Therefore, I filter out tablenames which contains “it” in it so that these IT department tables will be display to the user “developer1”.
When you finish setting up all the above settings, click “save” to save the rule.
Now, all the necessary settings to hide the table have been configured and the rule is ready to apply.
Let’s test and check if the created masking rule works correctly.
For testing, we will demonstrate using pgadmin. In pgadmin, connect to the same database by proxy. First, I will connect as “postgres” user.
Then, test the masking rule by executing the simple select query.
SELECT *
FROM pg_catalog.pg_class;
After execution, you still can see the output database table with both IT department data and HR department data inside the table. The table names are still visible in the left panel as well. Because, “postgres” user was not chosen as a restricted database user.
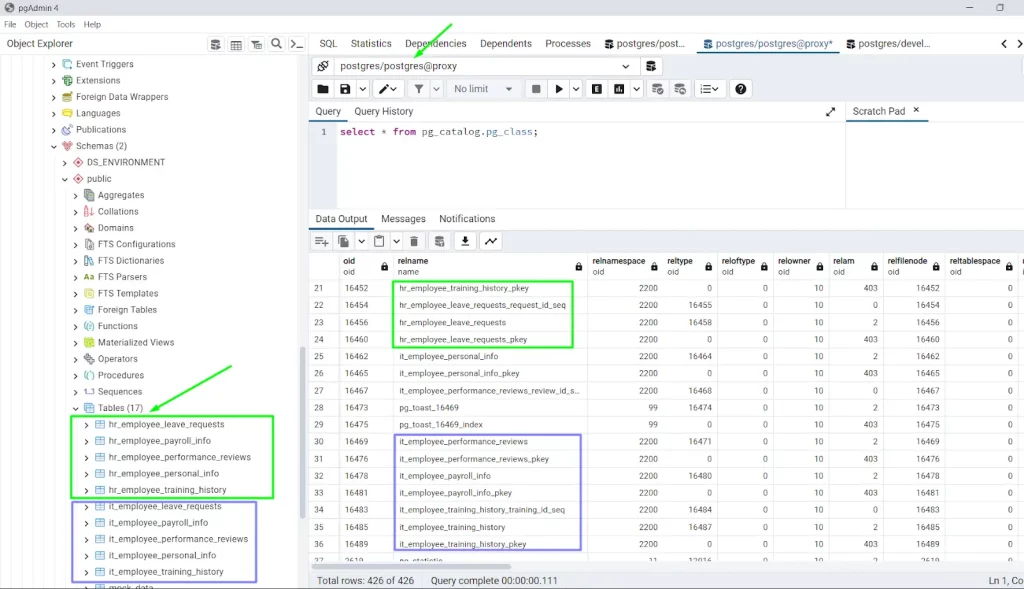
When we connected as “developer1” database user, we will not be able to see the rows related to HR inside “pg_catalog.pg_class” table because this user is restricted to access the data of HR department but still able to access the IT department’s data. Similarly, the display of the UI in the left panel will be changed. The tables other than IT department’s tables will be disappeared.
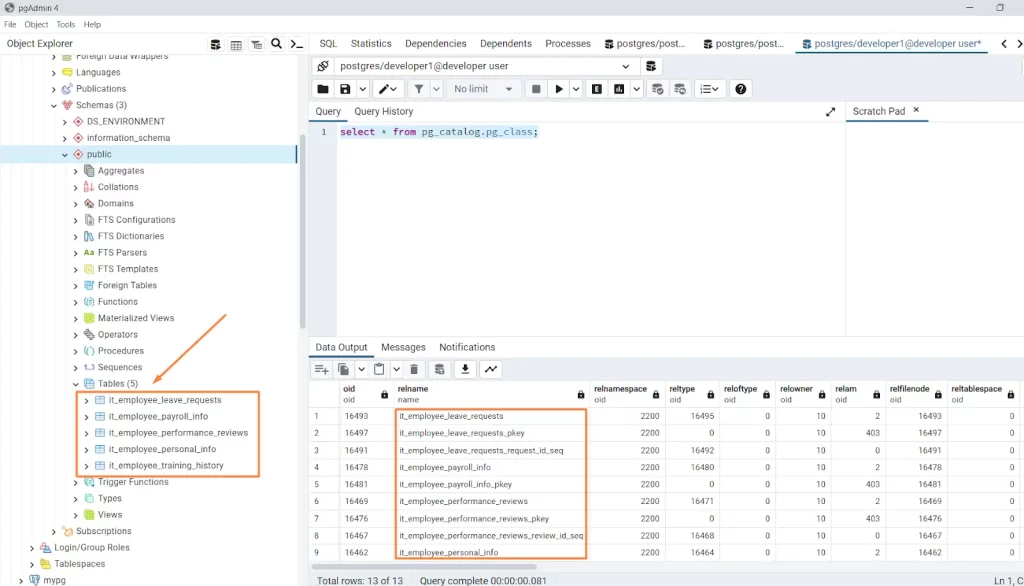
In this way, “Hide Rows” from Dynamic Data Masking can be used to protect the data even the system objects such as table-names from the unwanted users efficiently.