DataSunrise SSO Authentication Based on SAML (Okta)
In DataSunrise we always strive to make our users’ experience easier. Logging in to numerous services and websites can take a lot of time. Plus there is also a variety of different difficult passwords that you should remember or restore every time you forget it. DataSunrise has a solution to avoid such situations.
A Single sign-on (SSO) is a user authentication tool that securely uses one name and password to access multiple applications. Companies and enterprises can use SSO to ease the everyday routine of signing in to different platforms and applications several times a day by using one set of credentials.
Today we will describe how to configure SSO authentication based on SAML with Okta. SAML is an XML-based standard that enables the exchange of identification information. It sends data between identity providers (IdP) and service providers (SP).
In our case, DataSunrise is a Service Provider and Okta is an Identity Provider. There is the process of verification of users’ identities and permissions. After that, access to the server will be granted or denied.
Adding a New Application in Okta
To enable SAML authentication to the DataSunrise’s Web Console, do the following:
Register in the Okta service. Navigate to Applications → click Create App Integration.
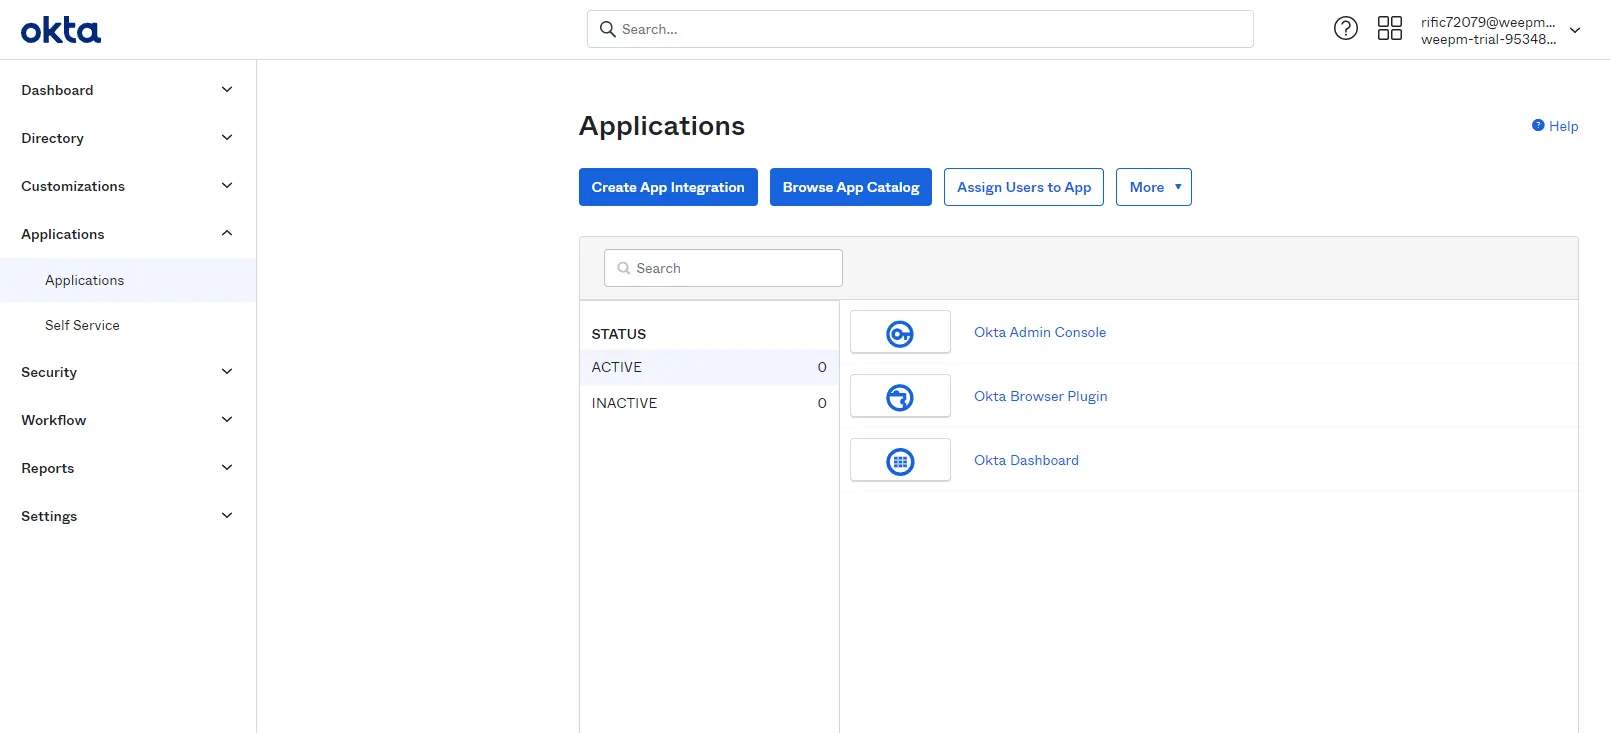
Picture 1: Adding Application
On the Create a new app integration tab, select SAML 2.0 as Sign-in method.
After that, you need to complete all the fields. Note that Single sign on URL should end with /sso_endpoint.
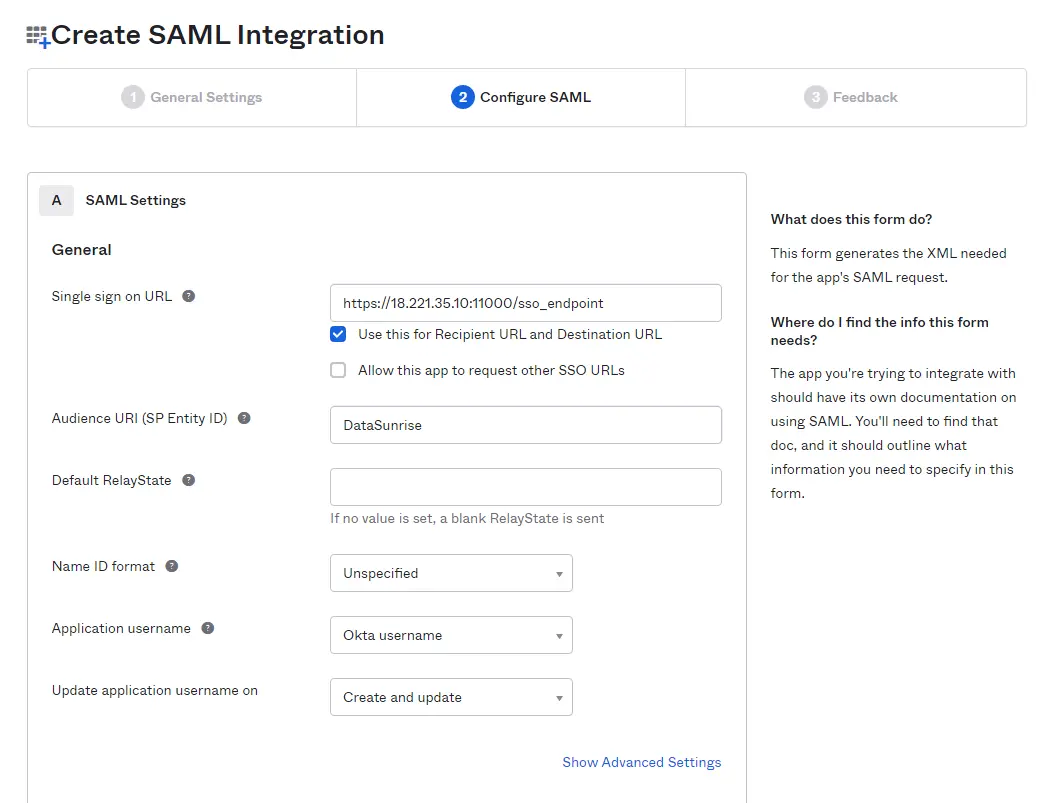
Picture 2: Configure SAML
After that, navigate to Applications → Sign On, and click View SAML setup instructions at the lower left-hand corner.
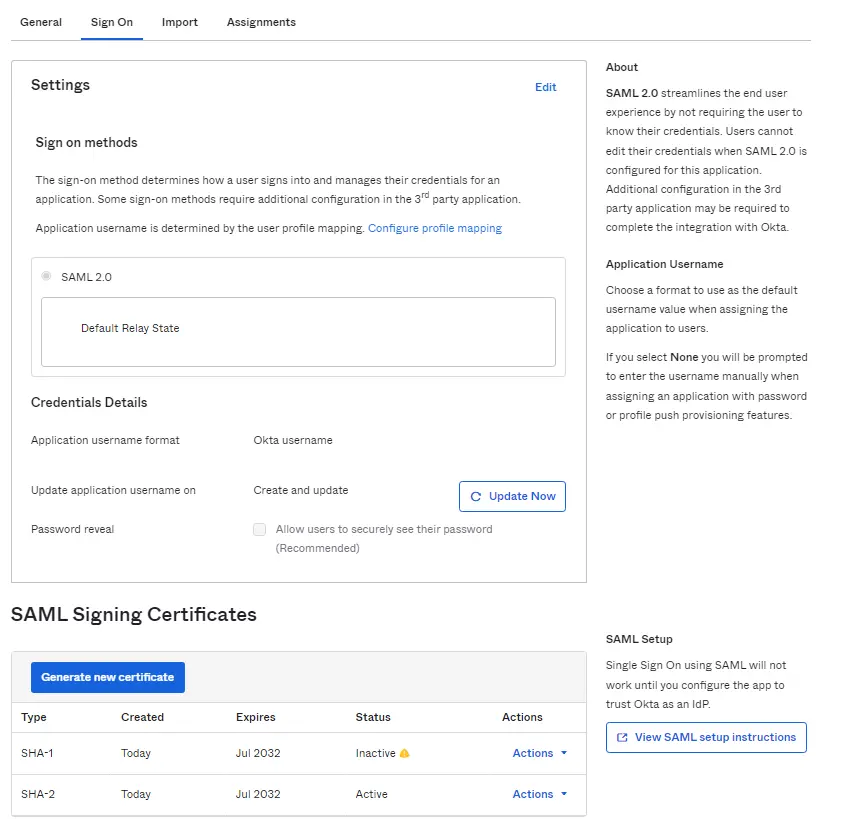
Picture 3: Sign On Settings
Copy the content of the Provide the following IDP metadata to your SP provider field. You will need this in the further adjustments.
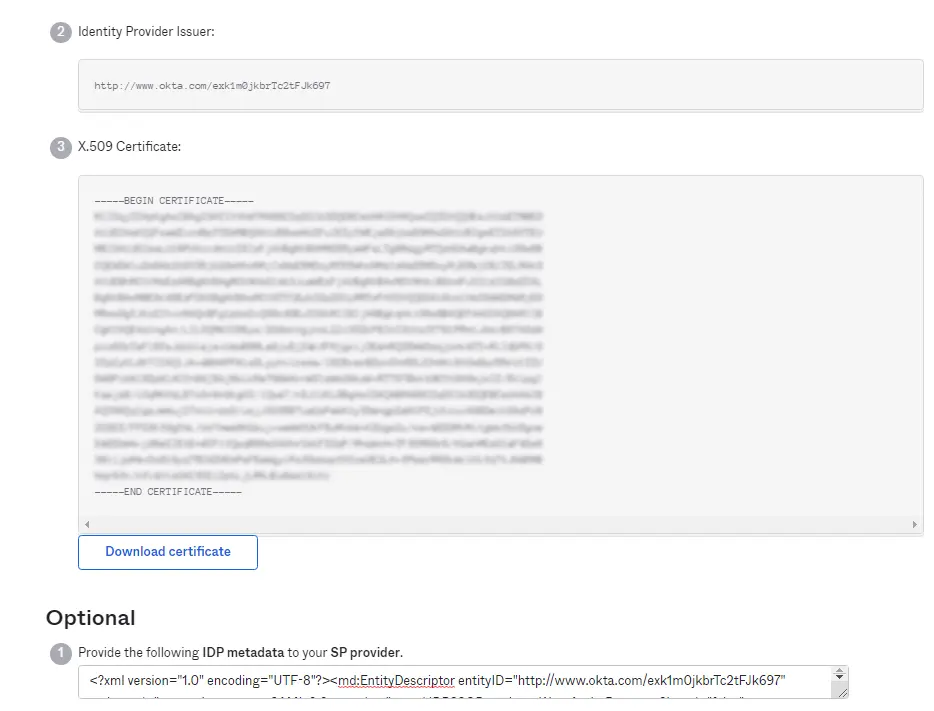
Picture 4: Optional Data
Navigate to Assign Applications and assign your application to your Okta user. A new page will open. Note the Identity Provider Single Sign-On URL. You will need this parameter value.
Configuring SSO in DataSunrise
In the DataSunrise’s Web Console navigate to System Settings → SSO, and click Add SSO Service.
Input a logical name, and select SAML in the SSO Service Type.
Load IdP metadata file from Okta (see step 5). You can use the Upload XML button or insert text in the XML Metadata field.
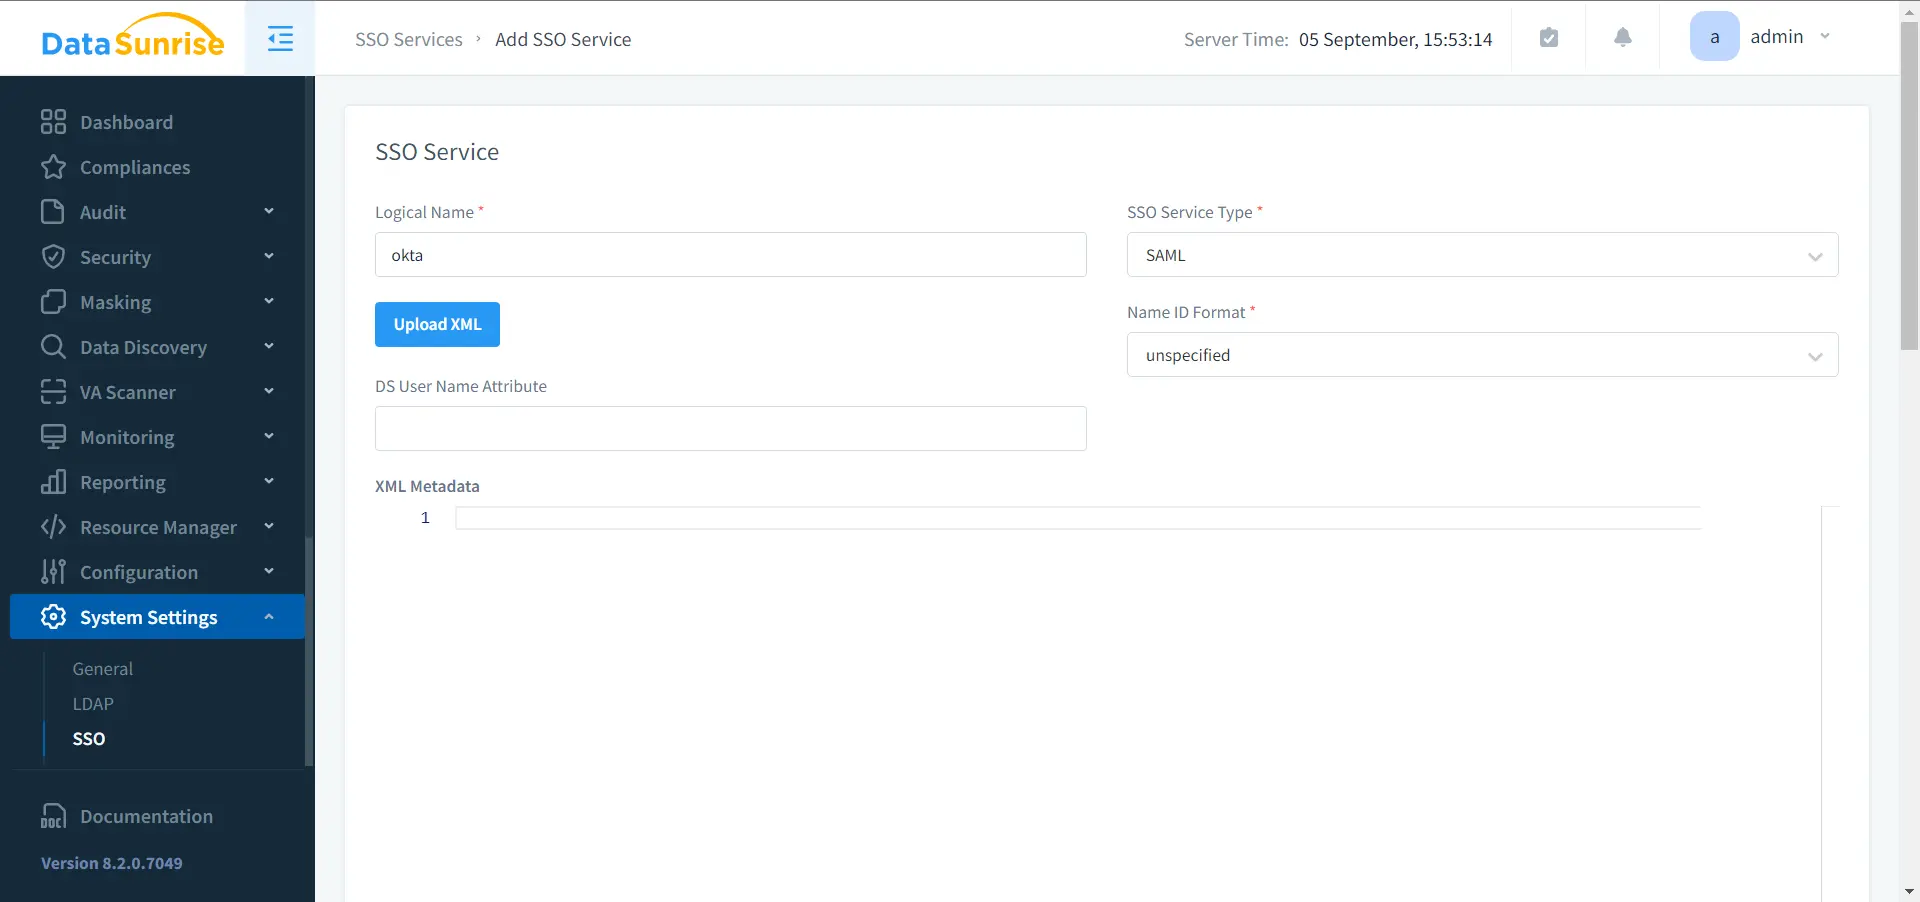
Picture 5: Add SSO Service
You will be redirected to the logon screen of the Web Console. After that, you will be able to log in with the help of SSO.
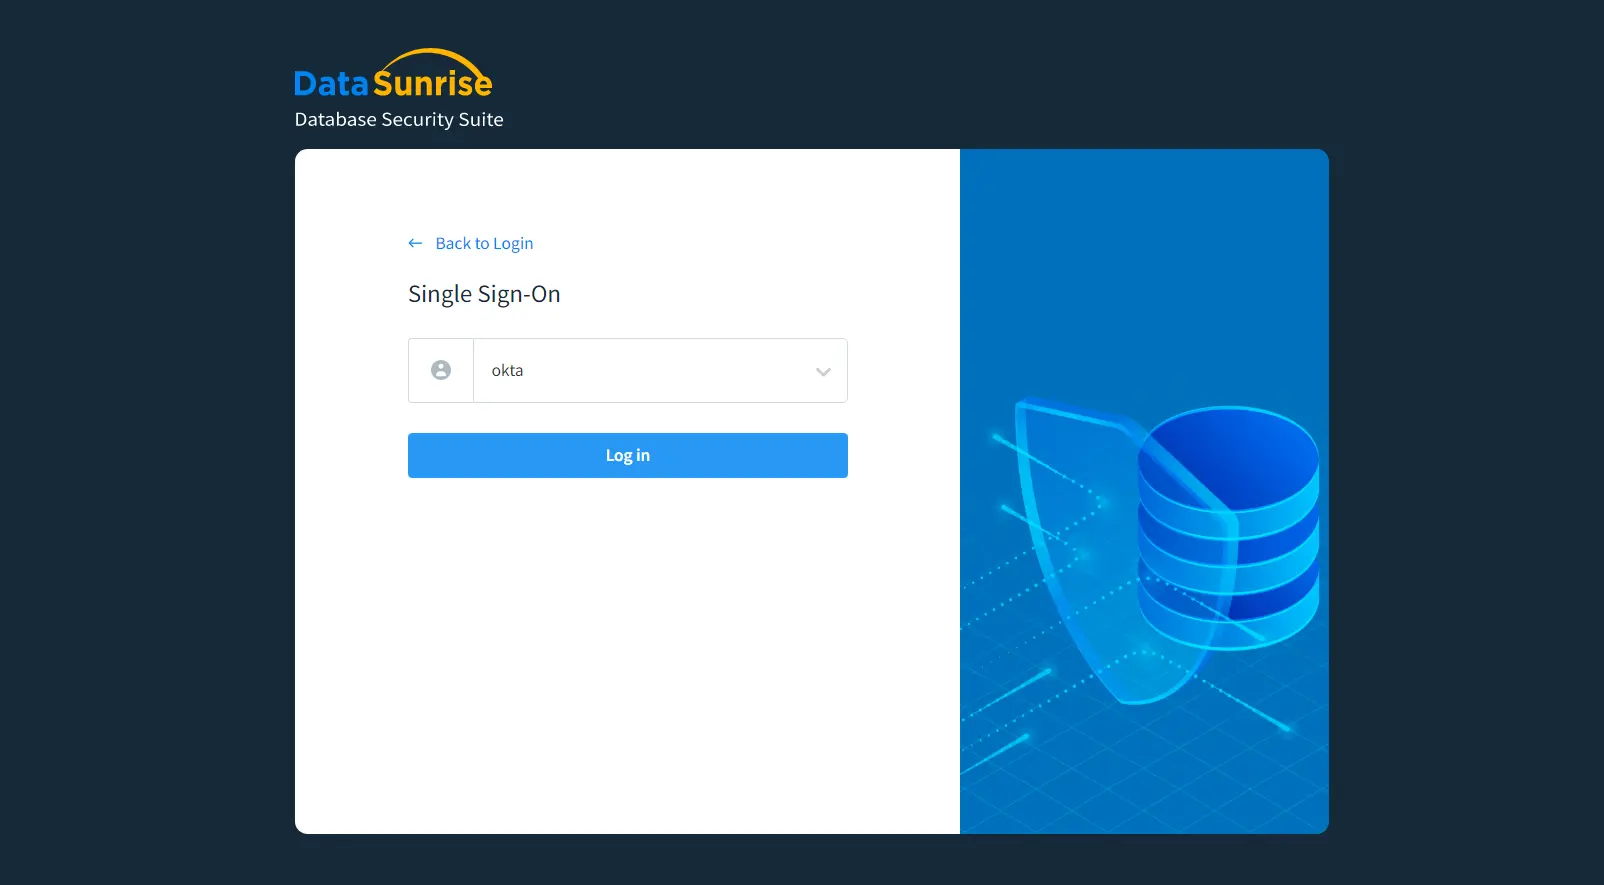
Picture 6: Login