Comprehensive Guide On How to Search for Sensitive Data in Images Hosted on AWS S3
To provide our clients with a powerful data discovery tool, some time ago we presented the OCR (Optical Character Recognition) functionality integrated into our Data Discovery module. This feature enables you to search for sensitive data such as personal data, credit card numbers, driver licenses, etc. contained in image files. The discovery process is performed automatically without the need of any human interference. OCR Data Discovery works with AWS S3 only for now.
DataSunrise’s OCR DD is based on the Tesseract engine which uses neuronet technology for character recognition. Tesseract uses the Leptonica library to read images with one of these formats:
- PNG
- JPEG
- TIFF
- JPEG 2000
- GIF
- WebP (including animated WebP)
- BMP
- PNM
How it works
Once an OCR Data Discovery task is started, the Discovery process undergoes the following phases:
- DataSunrise browses the contents of the specified S3 bucket for images.
- OCR engine’s preprocessor prepares discovered images for further processing by making them more contrast and sharp.
- DataSunrise with the help of the Tesseract OCR technology recognizes unstructured text pictured in images and utilizes Data Discovery algorithms in respect of this text according to your Data Discovery Task’s settings
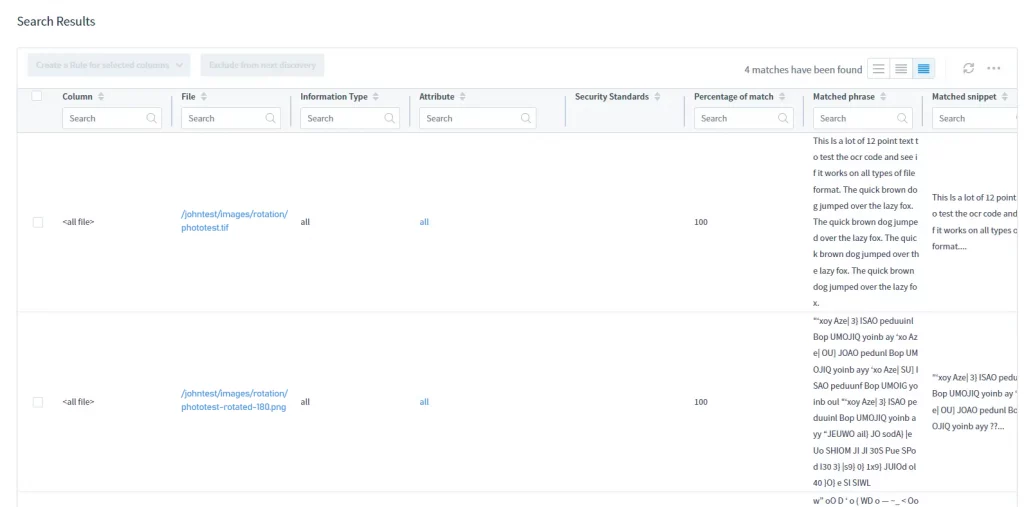
As a result, you get the names and location of image files that contain sensitive data and that data in a DD report.
Configuring an OCR task in DataSunrise
Now let’s take a look at the process of creating an OCR Data Discovery task.
First, note that OCR Data Discovery with NLP Data Discovery requires Java 1.8+
To utilize OCR Data Discovery, you need to do the following:
- Before proceeding to the next step, create an S3 DB Instance in DataSunrise (refer to DataSunrise’s User Guide for details).
- Navigate to Data Discovery → Periodic Data Discovery
- Create a Data Discovery task for your S3 bucket:
Fill out the General Settings:

- Name the task
- Select DS Server to start the task on
- If you want to perform Data Discovery for multiple DB Instance, check the corresponding check box and select the Instances of interest
- Check the Generate Reports check box to create a report either in PDF or CSV format.
In the Search Parameters section:

- Select your AWS S3 DB Instance. Provide credentials for your S3
- Choose Select Strategy: select all rows or just top rows
- Select Column Match Strategy: column filtering type
- Set Minimum Percentage of Match: it’s the minimum percentage of rows in a column that match the search filter conditions to consider the column as containing the required sensitive data
- Select the Number of Analyzed Rows: number of analyzed rows to be SELECTed
In Multiprocess Parameters:

Select Execution Strategy: Single DS Server or Multiple DS Servers for parallel calculation
Select DB Objects to search across:

Use the object tree to specify objects that should be browsed through during the Task execution
You can exclude certain objects from the search by using the corresponding object tree:

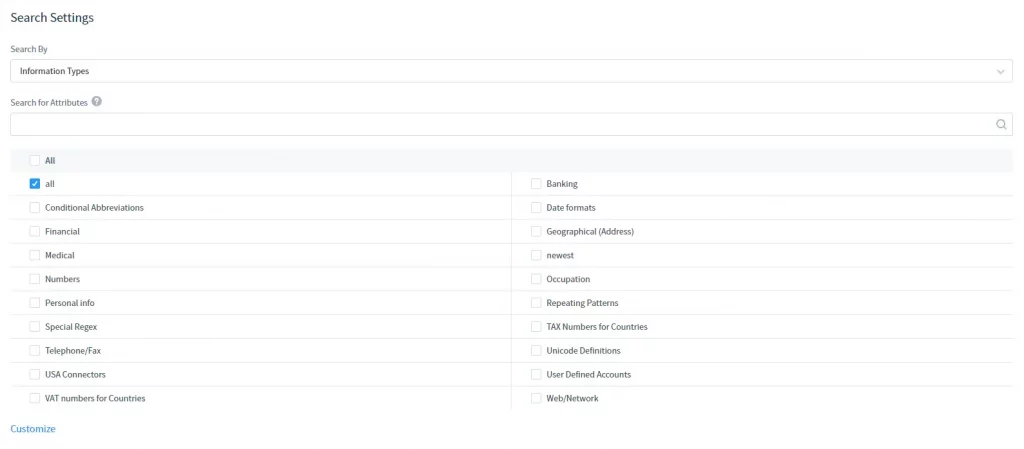
In Search Settings:

Select Information Type or Security Standards to search according to. Note that you can also use Search for Attributes to find an Information Type or Security Standard that you need by attribute.
In Startup Frequency:

Select frequency of the Task execution. Select Manual for manual starting or set a schedule.
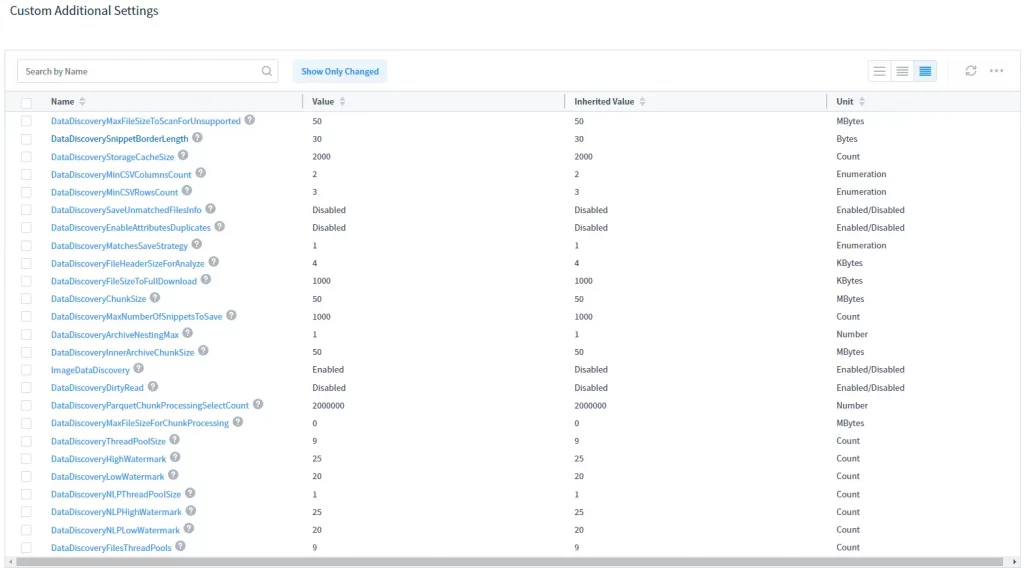
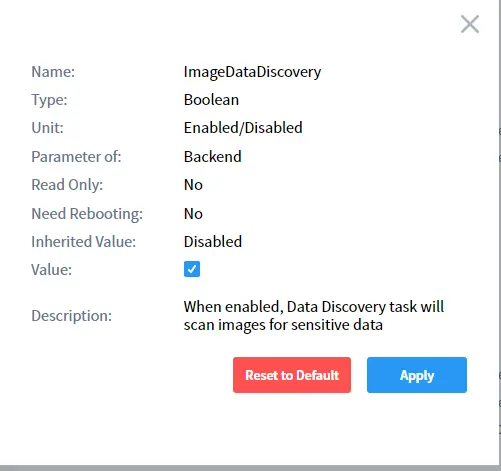
Important: you need to enable the imageDataDiscovery additional parameter before running the task. You can do it in Additional Parameters (System Settings -> Additional Parameters) or in the Custom Additional Settings subsection of the task’s page.

Select imageDataDiscovery in the list and enable it as shown below:

Run the task manually or on schedule and DataSunrise will perform OCR discovery automatically:

For search results, refer to the Search Results table:
